네이티브 컴포넌트
호스트 컴포넌트를 감싸는 새로운 React Native 컴포넌트를 만들고 싶다면, 예를 들어 안드로이드의 CheckBox나 iOS의 UIButton과 같은 고유한 컴포넌트를 만들고자 한다면, Fabric Native Component를 사용해야 한다.
이 가이드에서는 웹 뷰 컴포넌트를 구현하면서 Fabric Native Components를 만드는 방법을 단계별로 설명한다. 주요 단계는 다음과 같다:
- Flow나 TypeScript를 사용해 JavaScript 스펙을 정의한다.
- 제공된 스펙에서 코드를 생성하고 자동 링크되도록 의존성 관리 시스템을 구성한다.
- 네이티브 코드를 구현한다.
- 앱에서 컴포넌트를 사용한다.
컴포넌트를 사용하려면 기본 템플릿으로 생성된 앱이 필요하다:
npx @react-native-community/cli@latest init Demo --install-pods false
WebView 컴포넌트 만들기
이 가이드에서는 WebView 컴포넌트를 만드는 방법을 설명한다. Android의 WebView 컴포넌트와 iOS의 WKWebView 컴포넌트를 사용해 구현할 것이다.
먼저 컴포넌트 코드를 담을 폴더 구조를 만든다:
mkdir -p Demo/{specs,android/app/src/main/java/com/webview}
이 명령어를 실행하면 다음과 같은 구조가 생성된다:
Demo
├── android/app/src/main/java/com/webview
└── ios
└── specs
android/app/src/main/java/com/webview폴더에는 Android 코드를 담는다.ios폴더에는 iOS 코드를 담는다.specs폴더에는 Codegen의 스펙 파일을 저장한다.
1. 코드 생성 명세서 정의
코드 생성 명세서는 TypeScript 또는 Flow로 정의해야 한다. 이 명세서는 Codegen이 플랫폼 코드를 React가 실행되는 JavaScript 런타임에 연결하기 위해 C++, Objective-C++, Java 코드를 생성하는 데 사용된다.
Codegen과 함께 작동하려면 명세서 파일의 이름을 <MODULE_NAME>NativeComponent.{ts|js}로 지정해야 한다. NativeComponent라는 접미사는 단순한 관례가 아니라, Codegen이 명세서 파일을 식별하기 위해 실제로 사용하는 규칙이다.
다음은 WebView 컴포넌트에 대한 명세서 예제이다:
- TypeScript
- Flow
import type {HostComponent, ViewProps} from 'react-native';
import type {BubblingEventHandler} from 'react-native/Libraries/Types/CodegenTypes';
import codegenNativeComponent from 'react-native/Libraries/Utilities/codegenNativeComponent';

type WebViewScriptLoadedEvent = {
  result: 'success' | 'error';
};

export interface NativeProps extends ViewProps {
  sourceURL?: string;
  onScriptLoaded?: BubblingEventHandler<WebViewScriptLoadedEvent> | null;
}

export default codegenNativeComponent<NativeProps>(
  'CustomWebView',
) as HostComponent<NativeProps>;
// @flow strict-local

import type {HostComponent, ViewProps} from 'react-native';
import type {BubblingEventHandler} from 'react-native/Libraries/Types/CodegenTypes';
import codegenNativeComponent from 'react-native/Libraries/Utilities/codegenNativeComponent';

type WebViewScriptLoadedEvent = $ReadOnly<{|
  result: "success" | "error",
|}>;

type NativeProps = $ReadOnly<{|
  ...ViewProps,
  sourceURL?: string;
  onScriptLoaded?: BubblingEventHandler<WebViewScriptLoadedEvent>?;
|}>;

export default (codegenNativeComponent<NativeProps>(
  'CustomWebView',
): HostComponent<NativeProps>);
이 명세서는 import 구문을 제외하고 세 가지 주요 부분으로 구성된다:
WebViewScriptLoadedEvent는 네이티브에서 JavaScript로 전달해야 하는 이벤트 데이터를 위한 보조 데이터 타입이다.NativeProps는 컴포넌트에 설정할 수 있는 props를 정의한다.codegenNativeComponent구문은 커스텀 컴포넌트를 위한 코드를 생성하고, 네이티브 구현과 매칭하기 위해 사용할 컴포넌트 이름을 정의한다.
네이티브 모듈과 마찬가지로, specs/ 디렉토리에 여러 명세서 파일을 둘 수 있다. 사용할 수 있는 타입과 이들이 매핑되는 플랫폼 타입에 대한 더 자세한 정보는 부록을 참고한다.
2. Codegen 실행 설정
React Native의 Codegen 도구는 플랫폼별 인터페이스와 보일러플레이트 코드를 생성하기 위해 스펙을 사용한다. 이를 위해 Codegen은 스펙 파일의 위치와 처리 방법을 알아야 한다. package.json 파일을 다음과 같이 업데이트한다.
    "start": "react-native start",
    "test": "jest"
  },
  "codegenConfig": {
    "name": "AppSpec",
    "type": "components",
    "jsSrcsDir": "specs",
    "android": {
      "javaPackageName": "com.webview"
    },
    "ios": {
      "componentProvider": {
        "CustomWebView": "RCTWebView"
      }
    }
  },
  "dependencies": {
Codegen을 위한 모든 설정이 완료되면, 생성된 코드와 연결할 네이티브 코드를 준비해야 한다.
iOS의 경우, 스펙에서 내보낸 JS 컴포넌트 이름(CustomWebView)을 네이티브로 구현할 iOS 클래스와 명시적으로 매핑한다.
2. 네이티브 코드 작성하기
이제 네이티브 플랫폼 코드를 작성할 차례다. React가 뷰를 렌더링해야 할 때, 플랫폼이 올바른 네이티브 뷰를 생성하고 화면에 렌더링할 수 있도록 구현한다.
Android와 iOS 플랫폼 모두에 대해 작업을 진행해야 한다.
이 가이드는 새로운 아키텍처(New Architecture)에서만 동작하는 네이티브 컴포넌트를 만드는 방법을 보여준다. 새로운 아키텍처와 기존 아키텍처(Legacy Architecture)를 모두 지원해야 한다면, 하위 호환성 가이드를 참고한다.
- Android
- iOS
이제 웹 뷰를 렌더링할 수 있도록 안드로이드 플랫폼 코드를 작성할 차례다. 따라야 할 단계는 다음과 같다:
- Codegen 실행
ReactWebView코드 작성ReactWebViewManager코드 작성ReactWebViewPackage코드 작성- 애플리케이션에서
ReactWebViewPackage등록
1. Gradle을 통해 Codegen 실행
필요한 보일러플레이트 코드를 생성하려면 이 명령을 한 번 실행한다. 이렇게 생성된 코드를 원하는 IDE에서 사용할 수 있다.
cd android
./gradlew generateCodegenArtifactsFromSchema
Codegen은 구현해야 할 ViewManager 인터페이스와 웹 뷰에 대한 ViewManager 대리자를 생성한다.
2. ReactWebView 작성하기
ReactWebView는 React Native가 우리의 커스텀 컴포넌트를 사용할 때 렌더링하는 Android 네이티브 뷰를 감싸는 컴포넌트이다.
android/src/main/java/com/webview 폴더에 ReactWebView.java 또는 ReactWebView.kt 파일을 생성하고 아래 코드를 추가한다:
- Java
- Kotlin
package com.webview;

import android.content.Context;
import android.util.AttributeSet;
import android.webkit.WebView;
import android.webkit.WebViewClient;

import com.facebook.react.bridge.Arguments;
import com.facebook.react.bridge.WritableMap;
import com.facebook.react.bridge.ReactContext;
import com.facebook.react.uimanager.UIManagerHelper;
import com.facebook.react.uimanager.events.Event;

public class ReactWebView extends WebView {
  public ReactWebView(Context context) {
    super(context);
    configureComponent();
  }

  public ReactWebView(Context context, AttributeSet attrs) {
    super(context, attrs);
    configureComponent();
  }

  public ReactWebView(Context context, AttributeSet attrs, int defStyleAttr) {
    super(context, attrs, defStyleAttr);
    configureComponent();
  }

  private void configureComponent() {
    this.setLayoutParams(new LayoutParams(LayoutParams.MATCH_PARENT, LayoutParams.MATCH_PARENT));
    this.setWebViewClient(new WebViewClient() {
      @Override
      public void onPageFinished(WebView view, String url) {
        emitOnScriptLoaded(OnScriptLoadedEventResult.success);
      }
    });
  }

  public void emitOnScriptLoaded(OnScriptLoadedEventResult result) {
    ReactContext reactContext = (ReactContext) context;
    int surfaceId = UIManagerHelper.getSurfaceId(reactContext);
    EventDispatcher eventDispatcher = UIManagerHelper.getEventDispatcherForReactTag(reactContext, getId());
    WritableMap payload = Arguments.createMap();
    payload.putString("result", result.name());

    OnScriptLoadedEvent event = new OnScriptLoadedEvent(surfaceId, getId(), payload);
    if (eventDispatcher != null) {
      eventDispatcher.dispatchEvent(event);
    }
  }

  public enum OnScriptLoadedEventResult {
    success,
    error
  }

  private class OnScriptLoadedEvent extends Event<OnScriptLoadedEvent> {
    private final WritableMap payload;

    OnScriptLoadedEvent(int surfaceId, int viewId, WritableMap payload) {
      super(surfaceId, viewId);
      this.payload = payload;
    }

    @Override
    public String getEventName() {
      return "onScriptLoaded";
    }

    @Override
    public WritableMap getEventData() {
      return payload;
    }
  }
}
package com.webview

import android.content.Context
import android.util.AttributeSet
import android.webkit.WebView
import android.webkit.WebViewClient
import com.facebook.react.bridge.Arguments
import com.facebook.react.bridge.WritableMap
import com.facebook.react.bridge.ReactContext
import com.facebook.react.uimanager.UIManagerHelper
import com.facebook.react.uimanager.events.Event

class ReactWebView: WebView {
  constructor(context: Context) : super(context) {
    configureComponent()
  }

  constructor(context: Context, attrs: AttributeSet?) : super(context, attrs) {
    configureComponent()
  }

  constructor(context: Context, attrs: AttributeSet?, defStyleAttr: Int) : super(context, attrs, defStyleAttr) {
    configureComponent()
  }

  private fun configureComponent() {
    this.layoutParams = LayoutParams(LayoutParams.MATCH_PARENT, LayoutParams.MATCH_PARENT)
    this.webViewClient = object : WebViewClient() {
      override fun onPageFinished(view: WebView, url: String) {
        emitOnScriptLoaded(OnScriptLoadedEventResult.success)
      }
    }
  }

  fun emitOnScriptLoaded(result: OnScriptLoadedEventResult) {
    val reactContext = context as ReactContext
    val surfaceId = UIManagerHelper.getSurfaceId(reactContext)
    val eventDispatcher = UIManagerHelper.getEventDispatcherForReactTag(reactContext, id)
    val payload =
        Arguments.createMap().apply {
          putString("result", result.name)
        }
    val event = OnScriptLoadedEvent(surfaceId, id, payload)

    eventDispatcher?.dispatchEvent(event)
  }

  enum class OnScriptLoadedEventResult {
    success,
    error;
  }

  inner class OnScriptLoadedEvent(
      surfaceId: Int,
      viewId: Int,
      private val payload: WritableMap
  ) : Event<OnScriptLoadedEvent>(surfaceId, viewId) {
    override fun getEventName() = "onScriptLoaded"

    override fun getEventData() = payload
  }
}
ReactWebView는 Android의 WebView를 확장하여 플랫폼에서 이미 정의된 모든 속성을 쉽게 재사용할 수 있다.
이 클래스는 세 개의 Android 생성자를 정의하지만, 실제 구현은 configureComponent라는 private 함수에 위임한다. 이 함수는 컴포넌트의 특정 속성을 초기화하는 역할을 한다. 여기서는 WebView의 레이아웃을 설정하고, WebView의 동작을 커스텀하기 위해 WebClient를 정의한다. 이 코드에서 ReactWebView는 페이지 로딩이 완료될 때 이벤트를 발생시키기 위해 WebClient의 onPageFinished 메서드를 구현한다.
그 다음, 이벤트를 실제로 발생시키는 헬퍼 함수를 정의한다. 이벤트를 발생시키기 위해서는 다음 단계를 거쳐야 한다:
ReactContext의 참조를 가져온다.- 현재 보여지는 뷰의
surfaceId를 가져온다. - 뷰와 연결된
eventDispatcher의 참조를 가져온다. WritableMap객체를 사용해 이벤트의 페이로드를 구성한다.- JavaScript로 보낼 이벤트 객체를 생성한다.
eventDispatcher.dispatchEvent를 호출해 이벤트를 전송한다.
파일의 마지막 부분에는 이벤트를 전송하기 위해 필요한 데이터 타입의 정의가 포함되어 있다:
OnScriptLoadedEventResult:OnScriptLoaded이벤트의 가능한 결과를 나타낸다.- 실제
OnScriptLoadedEvent: React Native의Event클래스를 확장해야 한다.
3. WebViewManager 작성
WebViewManager는 React Native 런타임과 네이티브 뷰를 연결하는 클래스다.
앱에서 특정 컴포넌트를 렌더링하라는 지시를 받으면, React는 등록된 뷰 매니저를 사용해 뷰를 생성하고 필요한 모든 속성을 전달한다.
다음은 ReactWebViewManager의 코드다.
- Java
- Kotlin
package com.webview;

import com.facebook.react.bridge.ReactApplicationContext;
import com.facebook.react.module.annotations.ReactModule;
import com.facebook.react.uimanager.SimpleViewManager;
import com.facebook.react.uimanager.ThemedReactContext;
import com.facebook.react.uimanager.ViewManagerDelegate;
import com.facebook.react.uimanager.annotations.ReactProp;
import com.facebook.react.viewmanagers.CustomWebViewManagerInterface;
import com.facebook.react.viewmanagers.CustomWebViewManagerDelegate;

import java.util.HashMap;
import java.util.Map;

@ReactModule(name = ReactWebViewManager.REACT_CLASS)
class ReactWebViewManager extends SimpleViewManager<ReactWebView> implements CustomWebViewManagerInterface<ReactWebView> {
  private final CustomWebViewManagerDelegate<ReactWebView, ReactWebViewManager> delegate =
          new CustomWebViewManagerDelegate<>(this);

  @Override
  public ViewManagerDelegate<ReactWebView> getDelegate() {
    return delegate;
  }

  @Override
  public String getName() {
    return REACT_CLASS;
  }

  @Override
  public ReactWebView createViewInstance(ThemedReactContext context) {
    return new ReactWebView(context);
  }

  @ReactProp(name = "sourceUrl")
  @Override
  public void setSourceURL(ReactWebView view, String sourceURL) {
    if (sourceURL == null) {
      view.emitOnScriptLoaded(ReactWebView.OnScriptLoadedEventResult.error);
      return;
    }
    view.loadUrl(sourceURL, new HashMap<>());
  }

  public static final String REACT_CLASS = "CustomWebView";

  @Override
  public Map<String, Object> getExportedCustomBubblingEventTypeConstants() {
    Map<String, Object> map = new HashMap<>();
    Map<String, Object> bubblingMap = new HashMap<>();
    bubblingMap.put("phasedRegistrationNames", new HashMap<String, String>() {{
      put("bubbled", "onScriptLoaded");
      put("captured", "onScriptLoadedCapture");
    }});
    map.put("onScriptLoaded", bubblingMap);
    return map;
  }
}
package com.webview

import com.facebook.react.bridge.ReactApplicationContext;
import com.facebook.react.module.annotations.ReactModule;
import com.facebook.react.uimanager.SimpleViewManager;
import com.facebook.react.uimanager.ThemedReactContext;
import com.facebook.react.uimanager.ViewManagerDelegate;
import com.facebook.react.uimanager.annotations.ReactProp;
import com.facebook.react.viewmanagers.CustomWebViewManagerInterface;
import com.facebook.react.viewmanagers.CustomWebViewManagerDelegate;

@ReactModule(name = ReactWebViewManager.REACT_CLASS)
class ReactWebViewManager(context: ReactApplicationContext) : SimpleViewManager<ReactWebView>(), CustomWebViewManagerInterface<ReactWebView> {
  private val delegate: CustomWebViewManagerDelegate<ReactWebView, ReactWebViewManager> =
    CustomWebViewManagerDelegate(this)

  override fun getDelegate(): ViewManagerDelegate<ReactWebView> = delegate

  override fun getName(): String = REACT_CLASS

  override fun createViewInstance(context: ThemedReactContext): ReactWebView = ReactWebView(context)

  @ReactProp(name = "sourceUrl")
  override fun setSourceURL(view: ReactWebView, sourceURL: String?) {
    if (sourceURL == null) {
      view.emitOnScriptLoaded(ReactWebView.OnScriptLoadedEventResult.error)
      return;
    }
    view.loadUrl(sourceURL, emptyMap())
  }

  companion object {
    const val REACT_CLASS = "CustomWebView"
  }

  override fun getExportedCustomBubblingEventTypeConstants(): Map<String, Any> =
      mapOf(
          "onScriptLoaded" to
              mapOf(
                  "phasedRegistrationNames" to
                      mapOf(
                          "bubbled" to "onScriptLoaded",
                          "captured" to "onScriptLoadedCapture"
                      )))
}
ReactWebViewManager는 React의 SimpleViewManager 클래스를 상속하고, Codegen에 의해 생성된 CustomWebViewManagerInterface를 구현한다.
CustomWebViewManagerDelegate의 참조를 가지고 있으며, 이 역시 Codegen에 의해 생성된다.
getName 함수를 오버라이드하며, 이 함수는 spec의 codegenNativeComponent 함수 호출에서 사용한 이름과 동일한 값을 반환해야 한다.
createViewInstance 함수는 새로운 ReactWebView 인스턴스를 생성하는 역할을 한다.
뷰 매니저는 React 컴포넌트의 속성이 네이티브 뷰를 어떻게 업데이트할지 정의해야 한다. 예제에서는 React가 WebView에 설정할 sourceURL 속성을 어떻게 처리할지 결정해야 한다.
마지막으로, 컴포넌트가 이벤트를 발생시킬 수 있다면, getExportedCustomBubblingEventTypeConstants를 오버라이드해 버블링 이벤트의 이름을 매핑하거나, getExportedCustomDirectEventTypeConstants를 오버라이드해 직접 이벤트의 이름을 매핑해야 한다.
4. ReactWebViewPackage 작성하기
네이티브 모듈과 마찬가지로, 네이티브 컴포넌트도 ReactPackage 클래스를 구현해야 한다. 이 객체는 React Native 런타임에 컴포넌트를 등록하는 데 사용된다.
다음은 ReactWebViewPackage의 코드이다:
- Java
- Kotlin
package com.webview;

import com.facebook.react.BaseReactPackage;
import com.facebook.react.bridge.NativeModule;
import com.facebook.react.bridge.ReactApplicationContext;
import com.facebook.react.module.model.ReactModuleInfo;
import com.facebook.react.module.model.ReactModuleInfoProvider;
import com.facebook.react.uimanager.ViewManager;

import java.util.Collections;
import java.util.HashMap;
import java.util.List;
import java.util.Map;

public class ReactWebViewPackage extends BaseReactPackage {
  @Override
  public List<ViewManager<?, ?>> createViewManagers(ReactApplicationContext reactContext) {
    return Collections.singletonList(new ReactWebViewManager(reactContext));
  }

  @Override
  public NativeModule getModule(String s, ReactApplicationContext reactApplicationContext) {
    if (ReactWebViewManager.REACT_CLASS.equals(s)) {
      return new ReactWebViewManager(reactApplicationContext);
    }
    return null;
  }

  @Override
  public ReactModuleInfoProvider getReactModuleInfoProvider() {
    return new ReactModuleInfoProvider() {
      @Override
      public Map<String, ReactModuleInfo> get() {
        Map<String, ReactModuleInfo> map = new HashMap<>();
        map.put(ReactWebViewManager.REACT_CLASS, new ReactModuleInfo(
                ReactWebViewManager.REACT_CLASS, // name
                ReactWebViewManager.REACT_CLASS, // className
                false,                           // canOverrideExistingModule
                false,                           // needsEagerInit
                false,                           // isCxxModule
                true                             // isTurboModule
        ));
        return map;
      }
    };
  }
}
package com.webview

import com.facebook.react.BaseReactPackage
import com.facebook.react.bridge.NativeModule
import com.facebook.react.bridge.ReactApplicationContext
import com.facebook.react.module.model.ReactModuleInfo
import com.facebook.react.module.model.ReactModuleInfoProvider
import com.facebook.react.uimanager.ViewManager

class ReactWebViewPackage : BaseReactPackage() {
  override fun createViewManagers(reactContext: ReactApplicationContext): List<ViewManager<*, *>> {
    return listOf(ReactWebViewManager(reactContext))
  }

  override fun getModule(s: String, reactApplicationContext: ReactApplicationContext): NativeModule? {
    when (s) {
      ReactWebViewManager.REACT_CLASS -> ReactWebViewManager(reactApplicationContext)
    }
    return null
  }

  override fun getReactModuleInfoProvider(): ReactModuleInfoProvider = ReactModuleInfoProvider {
    mapOf(ReactWebViewManager.REACT_CLASS to ReactModuleInfo(
      _name = ReactWebViewManager.REACT_CLASS,
      _className = ReactWebViewManager.REACT_CLASS,
      _canOverrideExistingModule = false,
      _needsEagerInit = false,
      isCxxModule = false,
      isTurboModule = true,
    )
    )
  }
}
ReactWebViewPackage는 BaseReactPackage를 상속하며, 컴포넌트를 올바르게 등록하기 위해 필요한 모든 메서드를 구현한다.
createViewManagers메서드는 커스텀 뷰를 관리하는ViewManager를 생성하는 팩토리 메서드이다.getModule메서드는 React Native가 렌더링해야 하는 뷰에 따라 적절한ViewManager를 반환한다.getReactModuleInfoProvider는 런타임에 모듈을 등록할 때 필요한 모든 정보를 제공한다.
5. ReactWebViewPackage를 애플리케이션에 등록하기
마지막으로 ReactWebViewPackage를 애플리케이션에 등록해야 한다. 이를 위해 MainApplication 파일을 수정하고, getPackages 함수가 반환하는 패키지 목록에 ReactWebViewPackage를 추가한다.
package com.demo

import android.app.Application
import com.facebook.react.PackageList
import com.facebook.react.ReactApplication
import com.facebook.react.ReactHost
import com.facebook.react.ReactNativeHost
import com.facebook.react.ReactPackage
import com.facebook.react.defaults.DefaultNewArchitectureEntryPoint.load
import com.facebook.react.defaults.DefaultReactHost.getDefaultReactHost
import com.facebook.react.defaults.DefaultReactNativeHost
import com.facebook.react.soloader.OpenSourceMergedSoMapping
import com.facebook.soloader.SoLoader
import com.webview.ReactWebViewPackage

class MainApplication : Application(), ReactApplication {

  override val reactNativeHost: ReactNativeHost =
      object : DefaultReactNativeHost(this) {
        override fun getPackages(): List<ReactPackage> =
            PackageList(this).packages.apply {
              add(ReactWebViewPackage())
            }

        override fun getJSMainModuleName(): String = "index"

        override fun getUseDeveloperSupport(): Boolean = BuildConfig.DEBUG

        override val isNewArchEnabled: Boolean = BuildConfig.IS_NEW_ARCHITECTURE_ENABLED
        override val isHermesEnabled: Boolean = BuildConfig.IS_HERMES_ENABLED
      }

  override val reactHost: ReactHost
    get() = getDefaultReactHost(applicationContext, reactNativeHost)

  override fun onCreate() {
    super.onCreate()
    SoLoader.init(this, OpenSourceMergedSoMapping)
    if (BuildConfig.IS_NEW_ARCHITECTURE_ENABLED) {
      load()
    }
  }
}
이제 웹 뷰를 렌더링할 수 있도록 iOS 플랫폼 코드를 작성할 차례다. 따라야 할 단계는 다음과 같다:
- Codegen을 실행한다.
RCTWebView를 위한 코드를 작성한다.- 애플리케이션에서
RCTWebView를 등록한다.
1. 코드 생성 실행
코드 생성을 수동으로 실행할 수도 있지만, 컴포넌트를 데모할 애플리케이션을 이용해 자동으로 생성하는 것이 더 간편하다.
cd ios
bundle install
bundle exec pod install
중요한 점은 Xcode에서 WebView 네이티브 컴포넌트를 빌드할 때 사용할 코드 생성 로그를 확인할 수 있다는 것이다.
생성된 코드를 저장소에 커밋할 때 주의해야 한다. 생성된 코드는 React Native의 각 버전에 따라 다르다. React Native 버전과의 호환성을 제한하기 위해 npm의 peerDependencies를 사용한다.
3. RCTWebView 작성하기
Xcode를 사용해 iOS 프로젝트를 준비하려면 다음 5단계를 완료해야 한다:
- CocoPods로 생성된 Xcode Workspace 열기:
cd ios
open Demo.xcworkspace
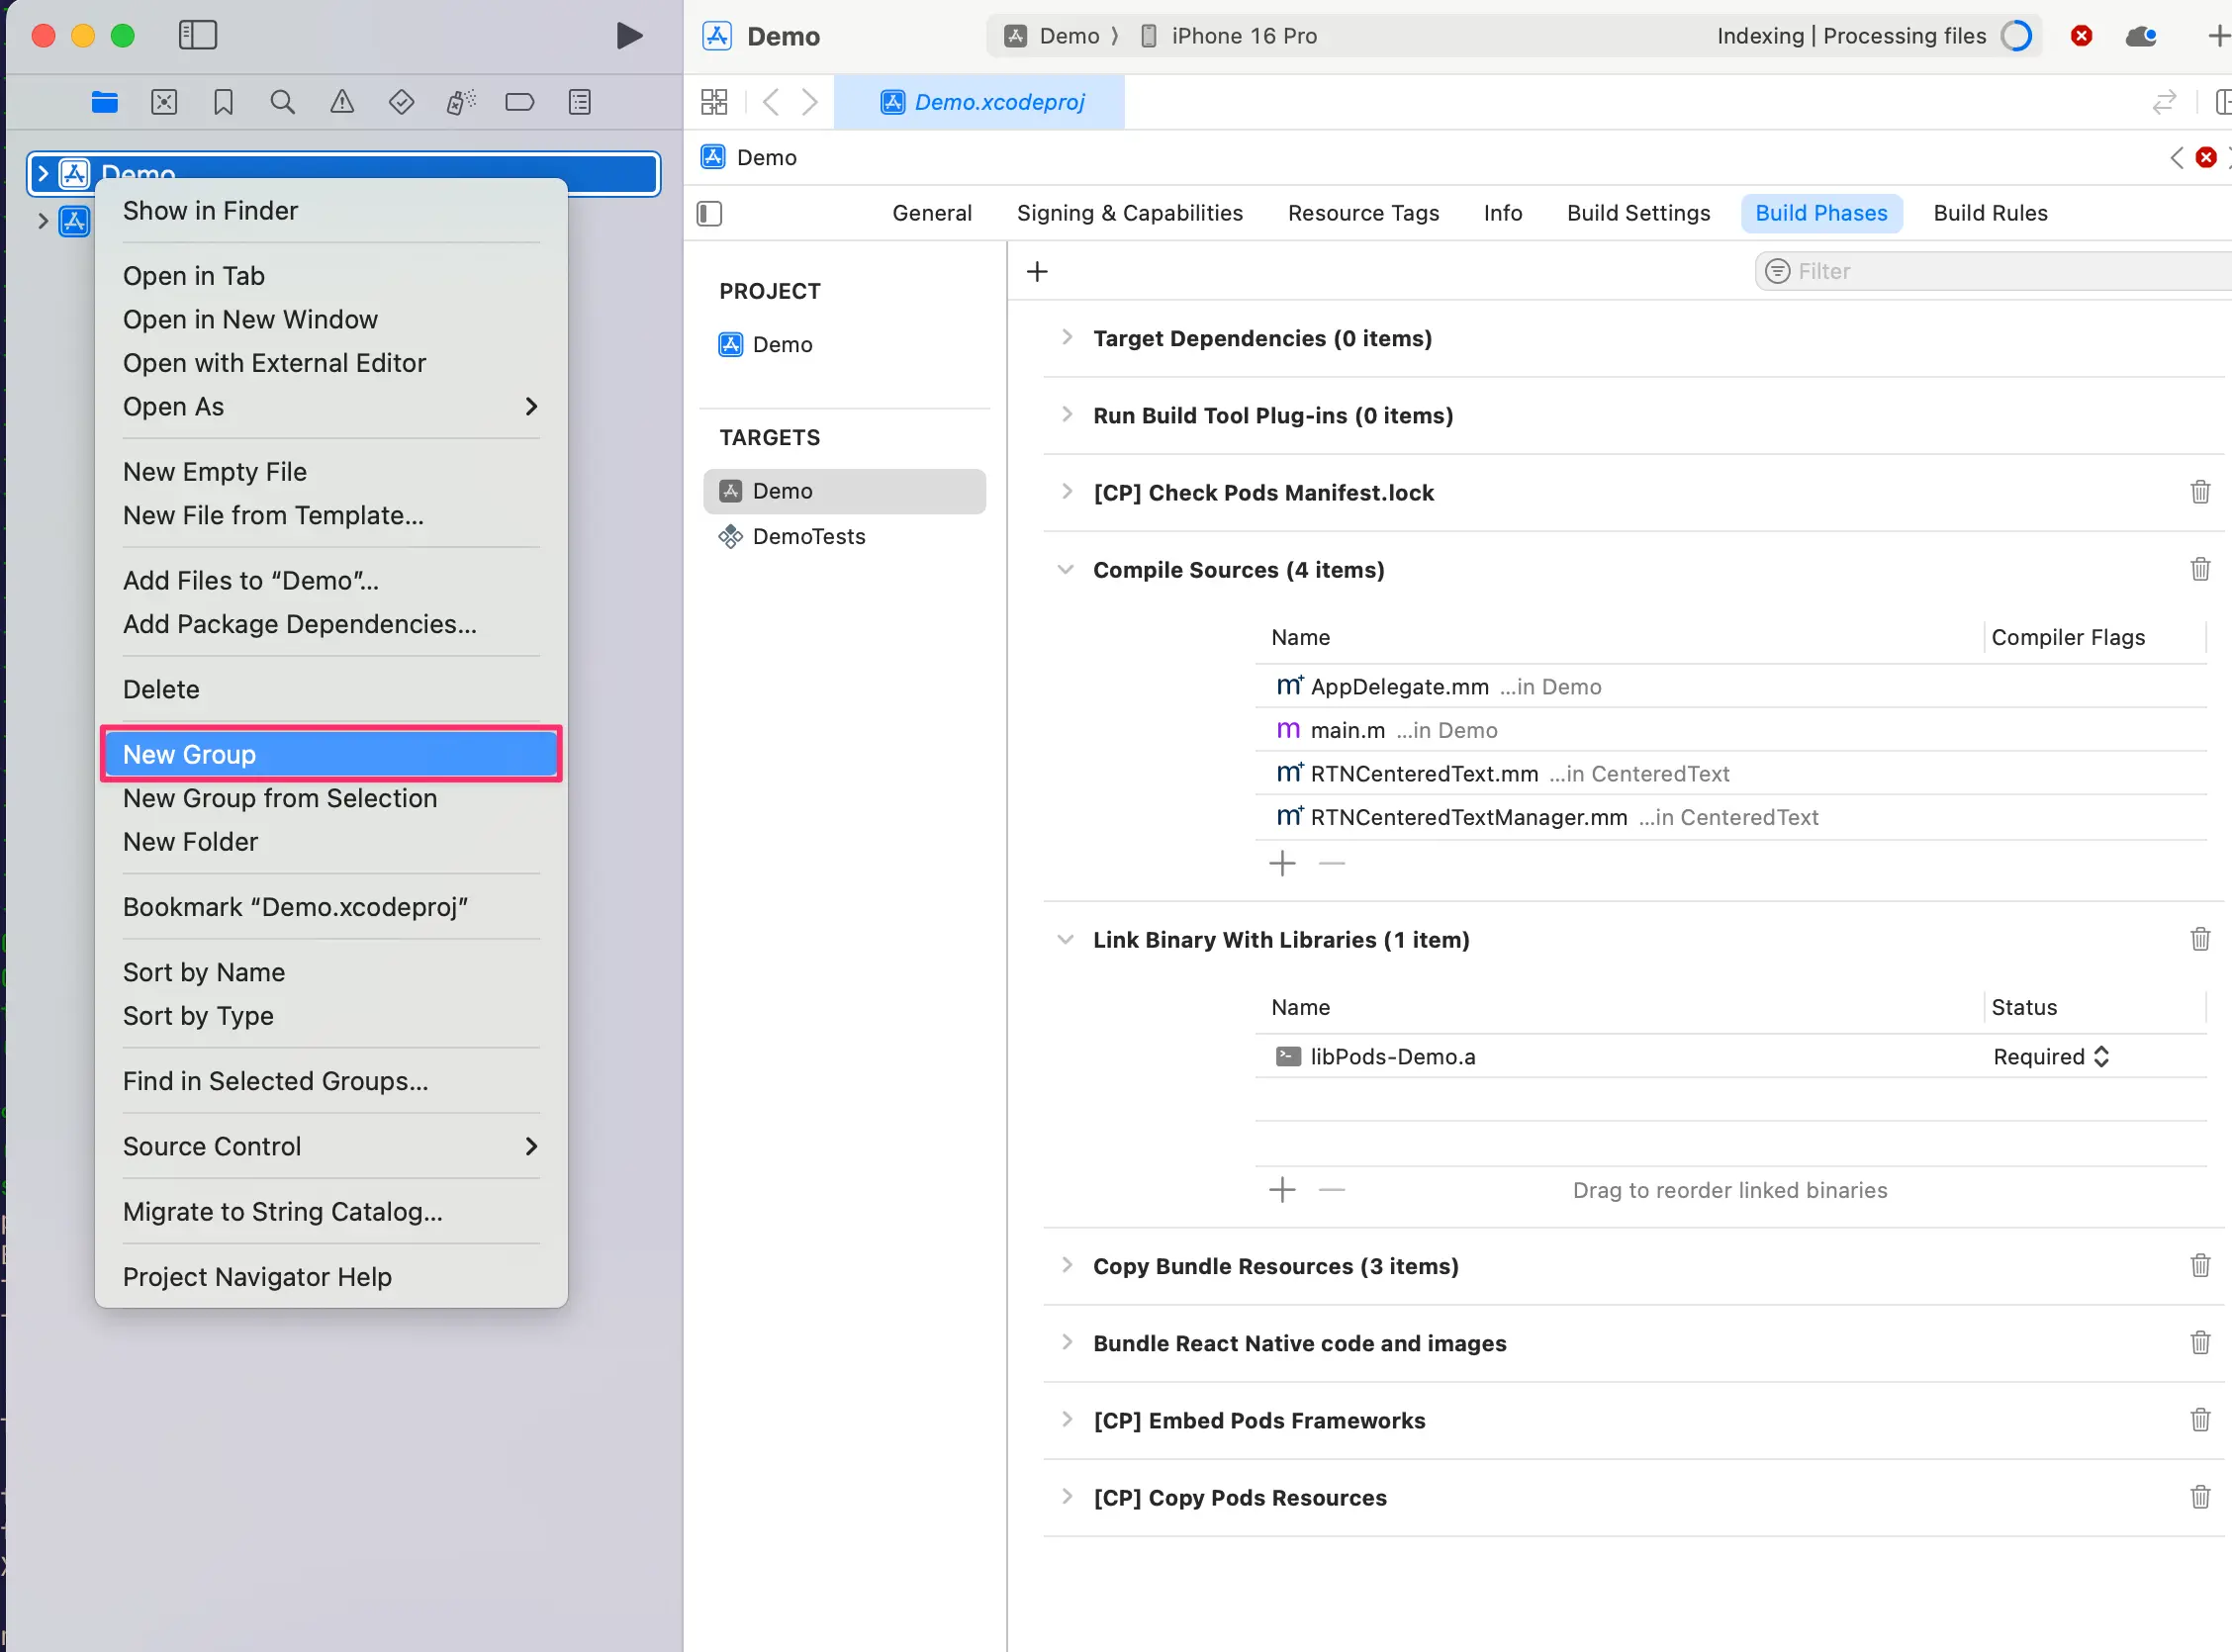
- 앱을 우클릭하고
New Group을 선택한 후, 새로운 그룹 이름을WebView로 지정한다.
WebView그룹 안에서New→File from Template을 선택해 새 파일을 생성한다.
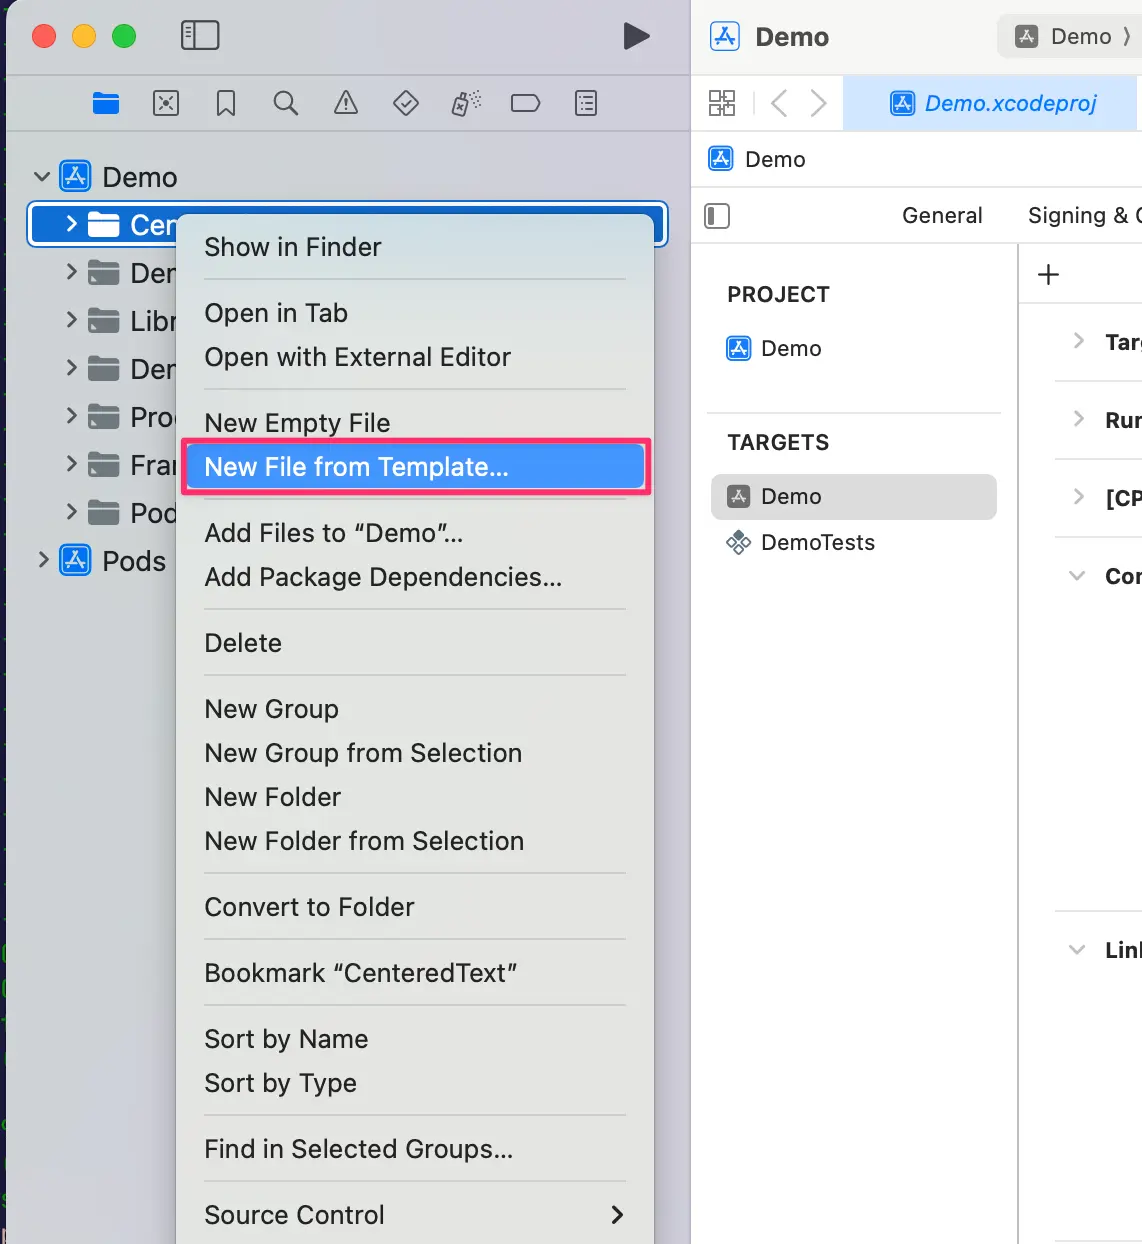
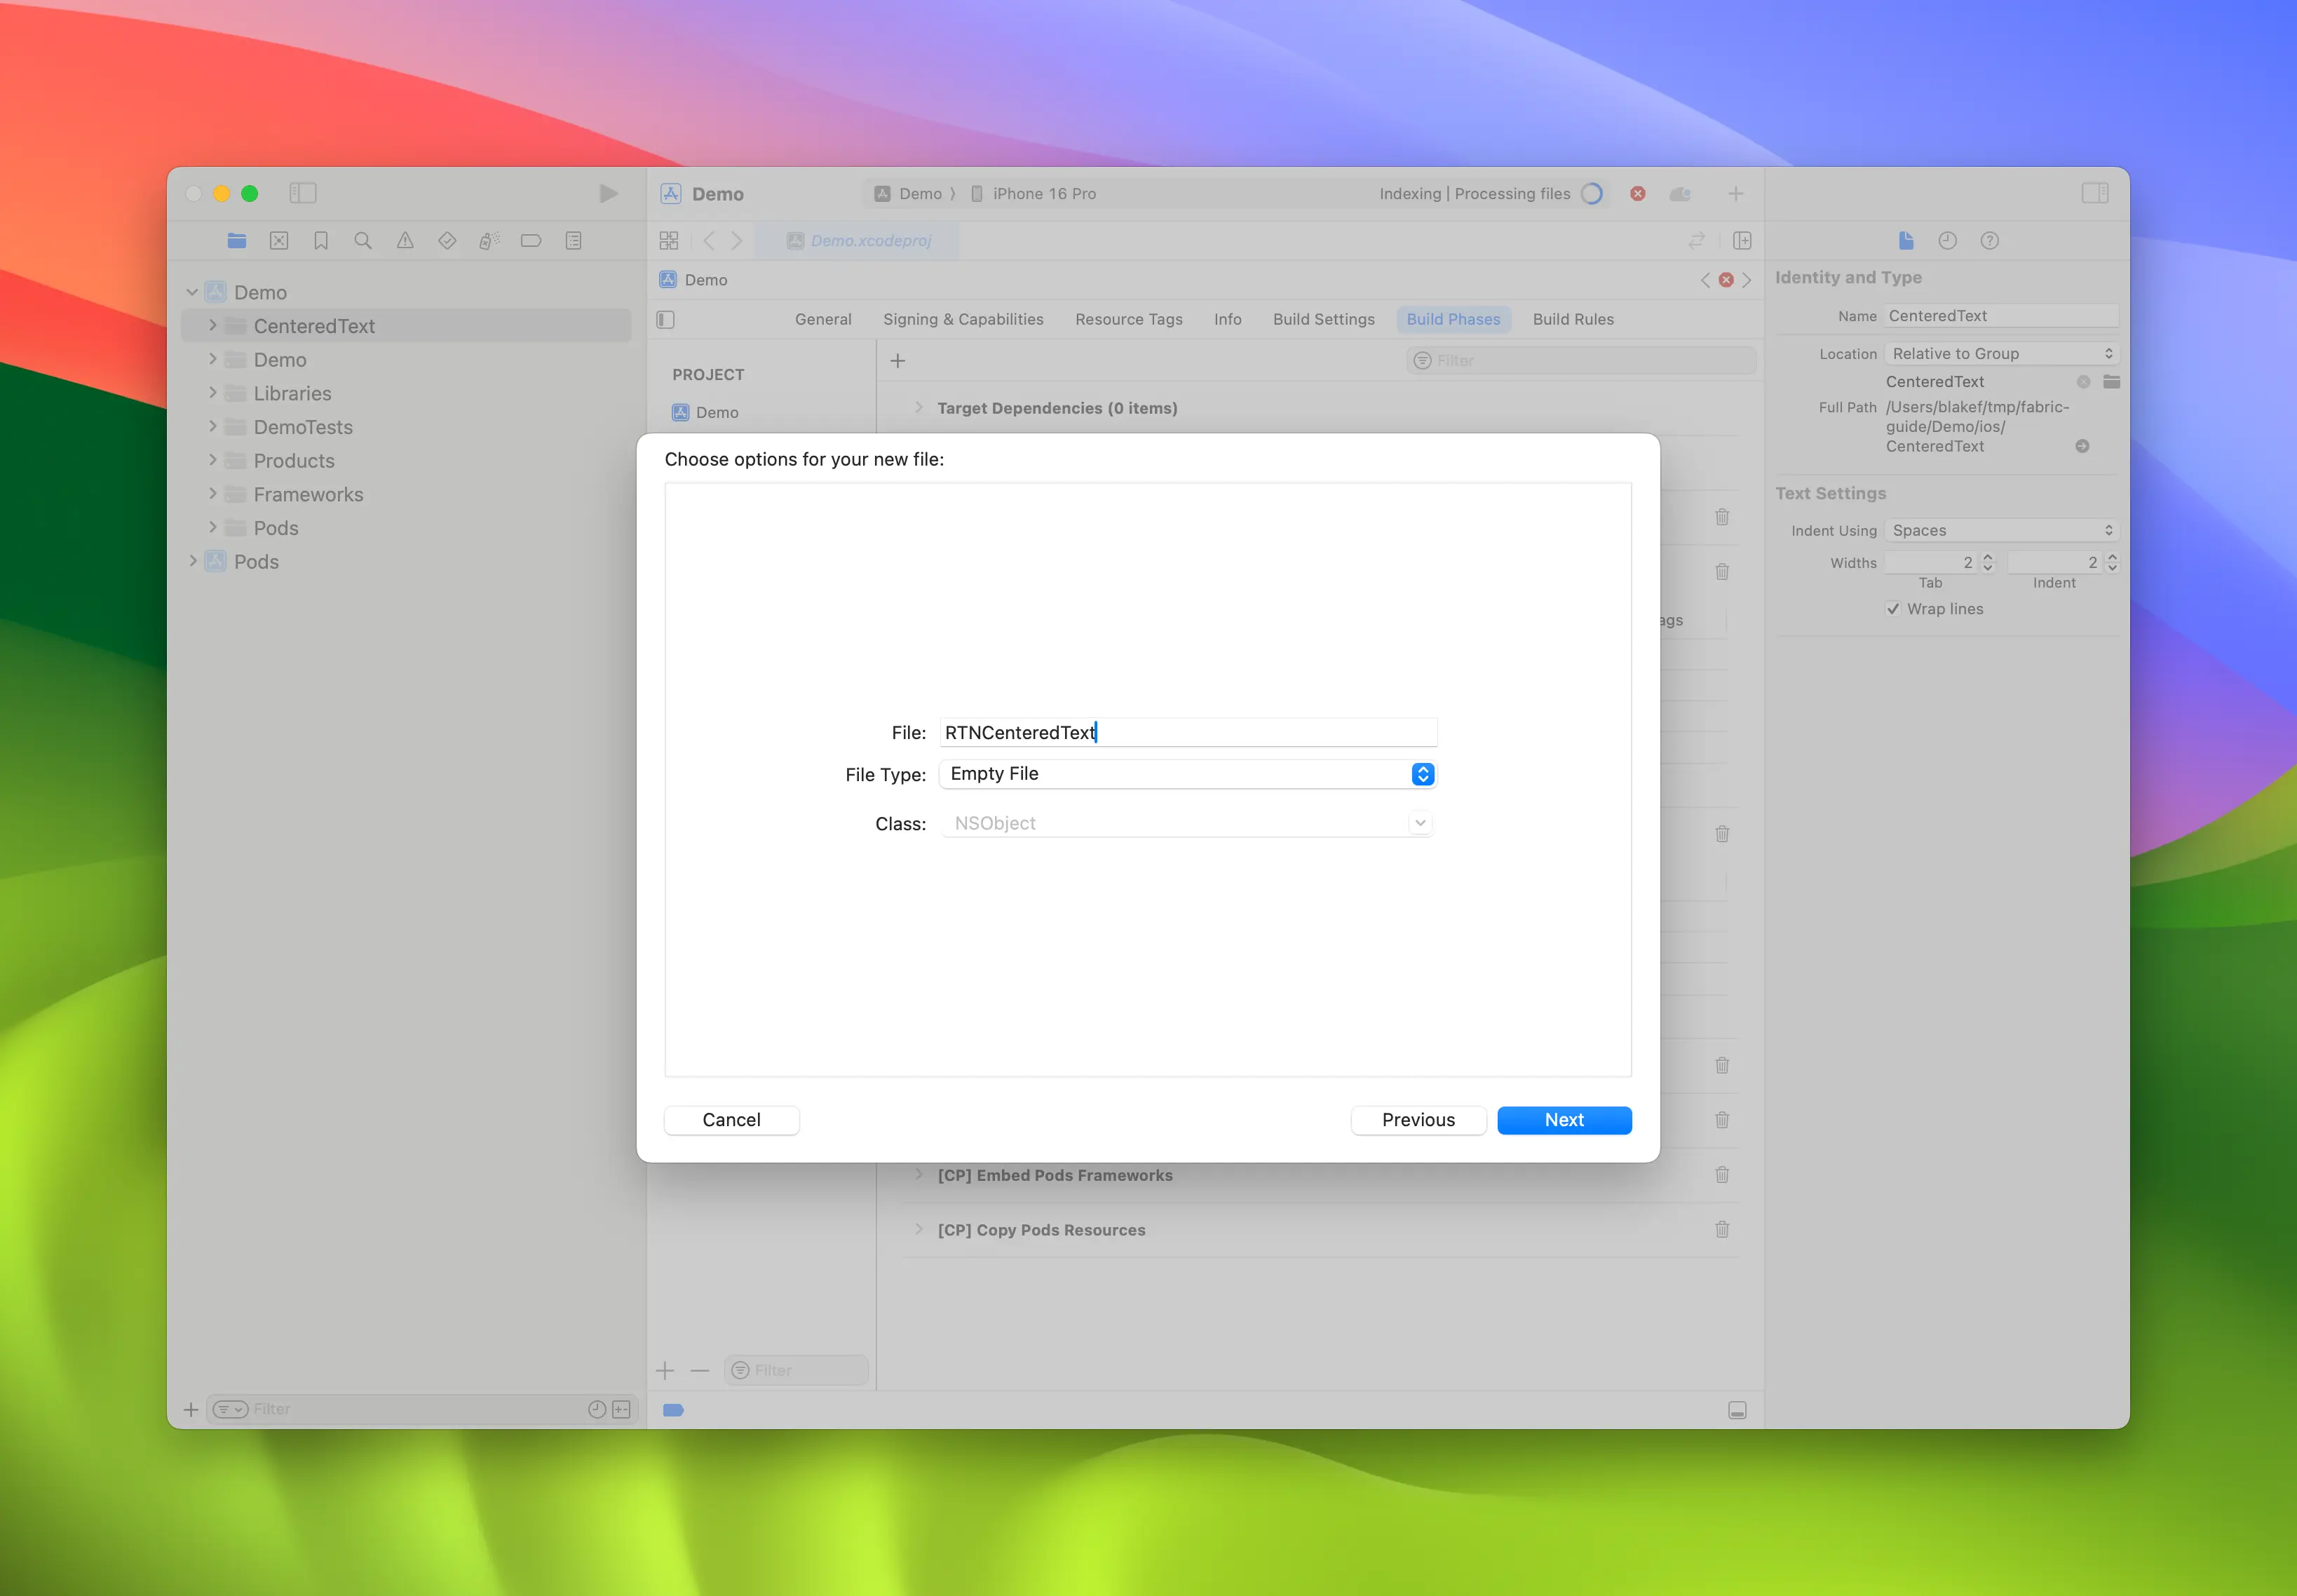
Objective-C File템플릿을 사용하고 파일 이름을RCTWebView로 지정한다.
-
4단계를 반복해
RCTWebView.h라는 헤더 파일을 생성한다. -
RCTWebView.m파일을RCTWebView.mm으로 변경해 Objective-C++ 파일로 만든다.
Podfile
...
Demo
├── AppDelegate.swift
...
├── RCTWebView.h
└── RCTWebView.mm
헤더 파일과 구현 파일을 생성한 후, 이제 구현을 시작할 수 있다.
RCTWebView.h 파일의 코드는 컴포넌트 인터페이스를 선언한다.
#import <React/RCTViewComponentView.h>
#import <UIKit/UIKit.h>

NS_ASSUME_NONNULL_BEGIN

@interface RCTWebView : RCTViewComponentView

// 뷰에서 접근할 네이티브 메서드를 여기에 선언

@end

NS_ASSUME_NONNULL_END
이 클래스는 RCTViewComponentView 클래스를 확장한 RCTWebView를 정의한다. 이 클래스는 React Native가 제공하는 모든 네이티브 컴포넌트의 기본 클래스다.
구현 파일(RCTWebView.mm)의 코드는 다음과 같다:
#import "RCTWebView.h"

#import <react/renderer/components/AppSpec/ComponentDescriptors.h>
#import <react/renderer/components/AppSpec/EventEmitters.h>
#import <react/renderer/components/AppSpec/Props.h>
#import <react/renderer/components/AppSpec/RCTComponentViewHelpers.h>
#import <WebKit/WebKit.h>

using namespace facebook::react;

@interface RCTWebView () <RCTCustomWebViewViewProtocol, WKNavigationDelegate>
@end

@implementation RCTWebView {
  NSURL * _sourceURL;
  WKWebView * _webView;
}

-(instancetype)init
{
  if(self = [super init]) {
    _webView = [WKWebView new];
    _webView.navigationDelegate = self;
    [self addSubview:_webView];
  }
  return self;
}

- (void)updateProps:(Props::Shared const &)props oldProps:(Props::Shared const &)oldProps
{
  const auto &oldViewProps = *std::static_pointer_cast<CustomWebViewProps const>(_props);
  const auto &newViewProps = *std::static_pointer_cast<CustomWebViewProps const>(props);

  // 프로퍼티 처리
  if (oldViewProps.sourceURL != newViewProps.sourceURL) {
    NSString *urlString = [NSString stringWithCString:newViewProps.sourceURL.c_str() encoding:NSUTF8StringEncoding];
    _sourceURL = [NSURL URLWithString:urlString];
    if ([self urlIsValid:newViewProps.sourceURL]) {
      [_webView loadRequest:[NSURLRequest requestWithURL:_sourceURL]];
    }
  }

  [super updateProps:props oldProps:oldProps];
}

-(void)layoutSubviews
{
  [super layoutSubviews];
  _webView.frame = self.bounds;

}

#pragma mark - WKNavigationDelegate

-(void)webView:(WKWebView *)webView didFinishNavigation:(WKNavigation *)navigation
{
  CustomWebViewEventEmitter::OnScriptLoaded result = CustomWebViewEventEmitter::OnScriptLoaded{CustomWebViewEventEmitter::OnScriptLoadedResult::Success};
  self.eventEmitter.onScriptLoaded(result);
}

- (BOOL)urlIsValid:(std::string)propString
{
  if (propString.length() > 0 && !_sourceURL) {
    CustomWebViewEventEmitter::OnScriptLoaded result = CustomWebViewEventEmitter::OnScriptLoaded{CustomWebViewEventEmitter::OnScriptLoadedResult::Error};

    self.eventEmitter.onScriptLoaded(result);
    return NO;
  }
  return YES;
}

// 이벤트 에미터 유틸리티 메서드
- (const CustomWebViewEventEmitter &)eventEmitter
{
  return static_cast<const CustomWebViewEventEmitter &>(*_eventEmitter);
}

+ (ComponentDescriptorProvider)componentDescriptorProvider
{
  return concreteComponentDescriptorProvider<CustomWebViewComponentDescriptor>();
}

@end
이 코드는 Objective-C++로 작성되었으며 여러 세부 사항을 포함한다:
@interface는 두 프로토콜을 구현한다:RCTCustomWebViewViewProtocol: Codegen에 의해 생성됨;WKNavigationDelegate: WebKit 프레임워크가 제공하며 웹 뷰 네비게이션 이벤트를 처리함;
init메서드는WKWebView를 인스턴스화하고 서브뷰로 추가하며navigationDelegate를 설정함;updateProps메서드는 컴포넌트의 프로퍼티가 변경될 때 React Native에 의해 호출됨;layoutSubviews메서드는 커스텀 뷰의 레이아웃 방식을 정의함;webView:didFinishNavigation:메서드는WKWebView가 페이지 로딩을 완료했을 때 수행할 작업을 처리함;urlIsValid:(std::string)propString메서드는 프로퍼티로 받은 URL이 유효한지 확인함;eventEmitter메서드는 강력한 타입의eventEmitter인스턴스를 반환하는 유틸리티임;componentDescriptorProvider는 Codegen에 의해 생성된ComponentDescriptor를 반환함;
WebKit 프레임워크 추가하기
이 단계는 웹 뷰를 생성할 때만 필요하다. iOS의 웹 컴포넌트는 Apple이 제공하는 WebKit 프레임워크와 연결되어야 한다. 만약 여러분의 컴포넌트가 웹 관련 기능에 접근할 필요가 없다면 이 단계를 건너뛰어도 된다.
웹 뷰는 Xcode와 디바이스에 포함된 프레임워크 중 하나인 WebKit을 통해 Apple이 제공하는 몇 가지 기능에 접근해야 한다. 네이티브 코드에서 RCTWebView.mm 파일에 추가된 #import <WebKit/WebKit.h> 라인을 통해 이를 확인할 수 있다.
앱에 WebKit 프레임워크를 연결하려면 다음 단계를 따르면 된다:
- Xcode에서 프로젝트를 클릭한다.
- 앱 타겟을 선택한다.
- General 탭을 선택한다.
- "Frameworks, Libraries, and Embedded Contents" 섹션을 찾을 때까지 스크롤한 후
+버튼을 누른다.
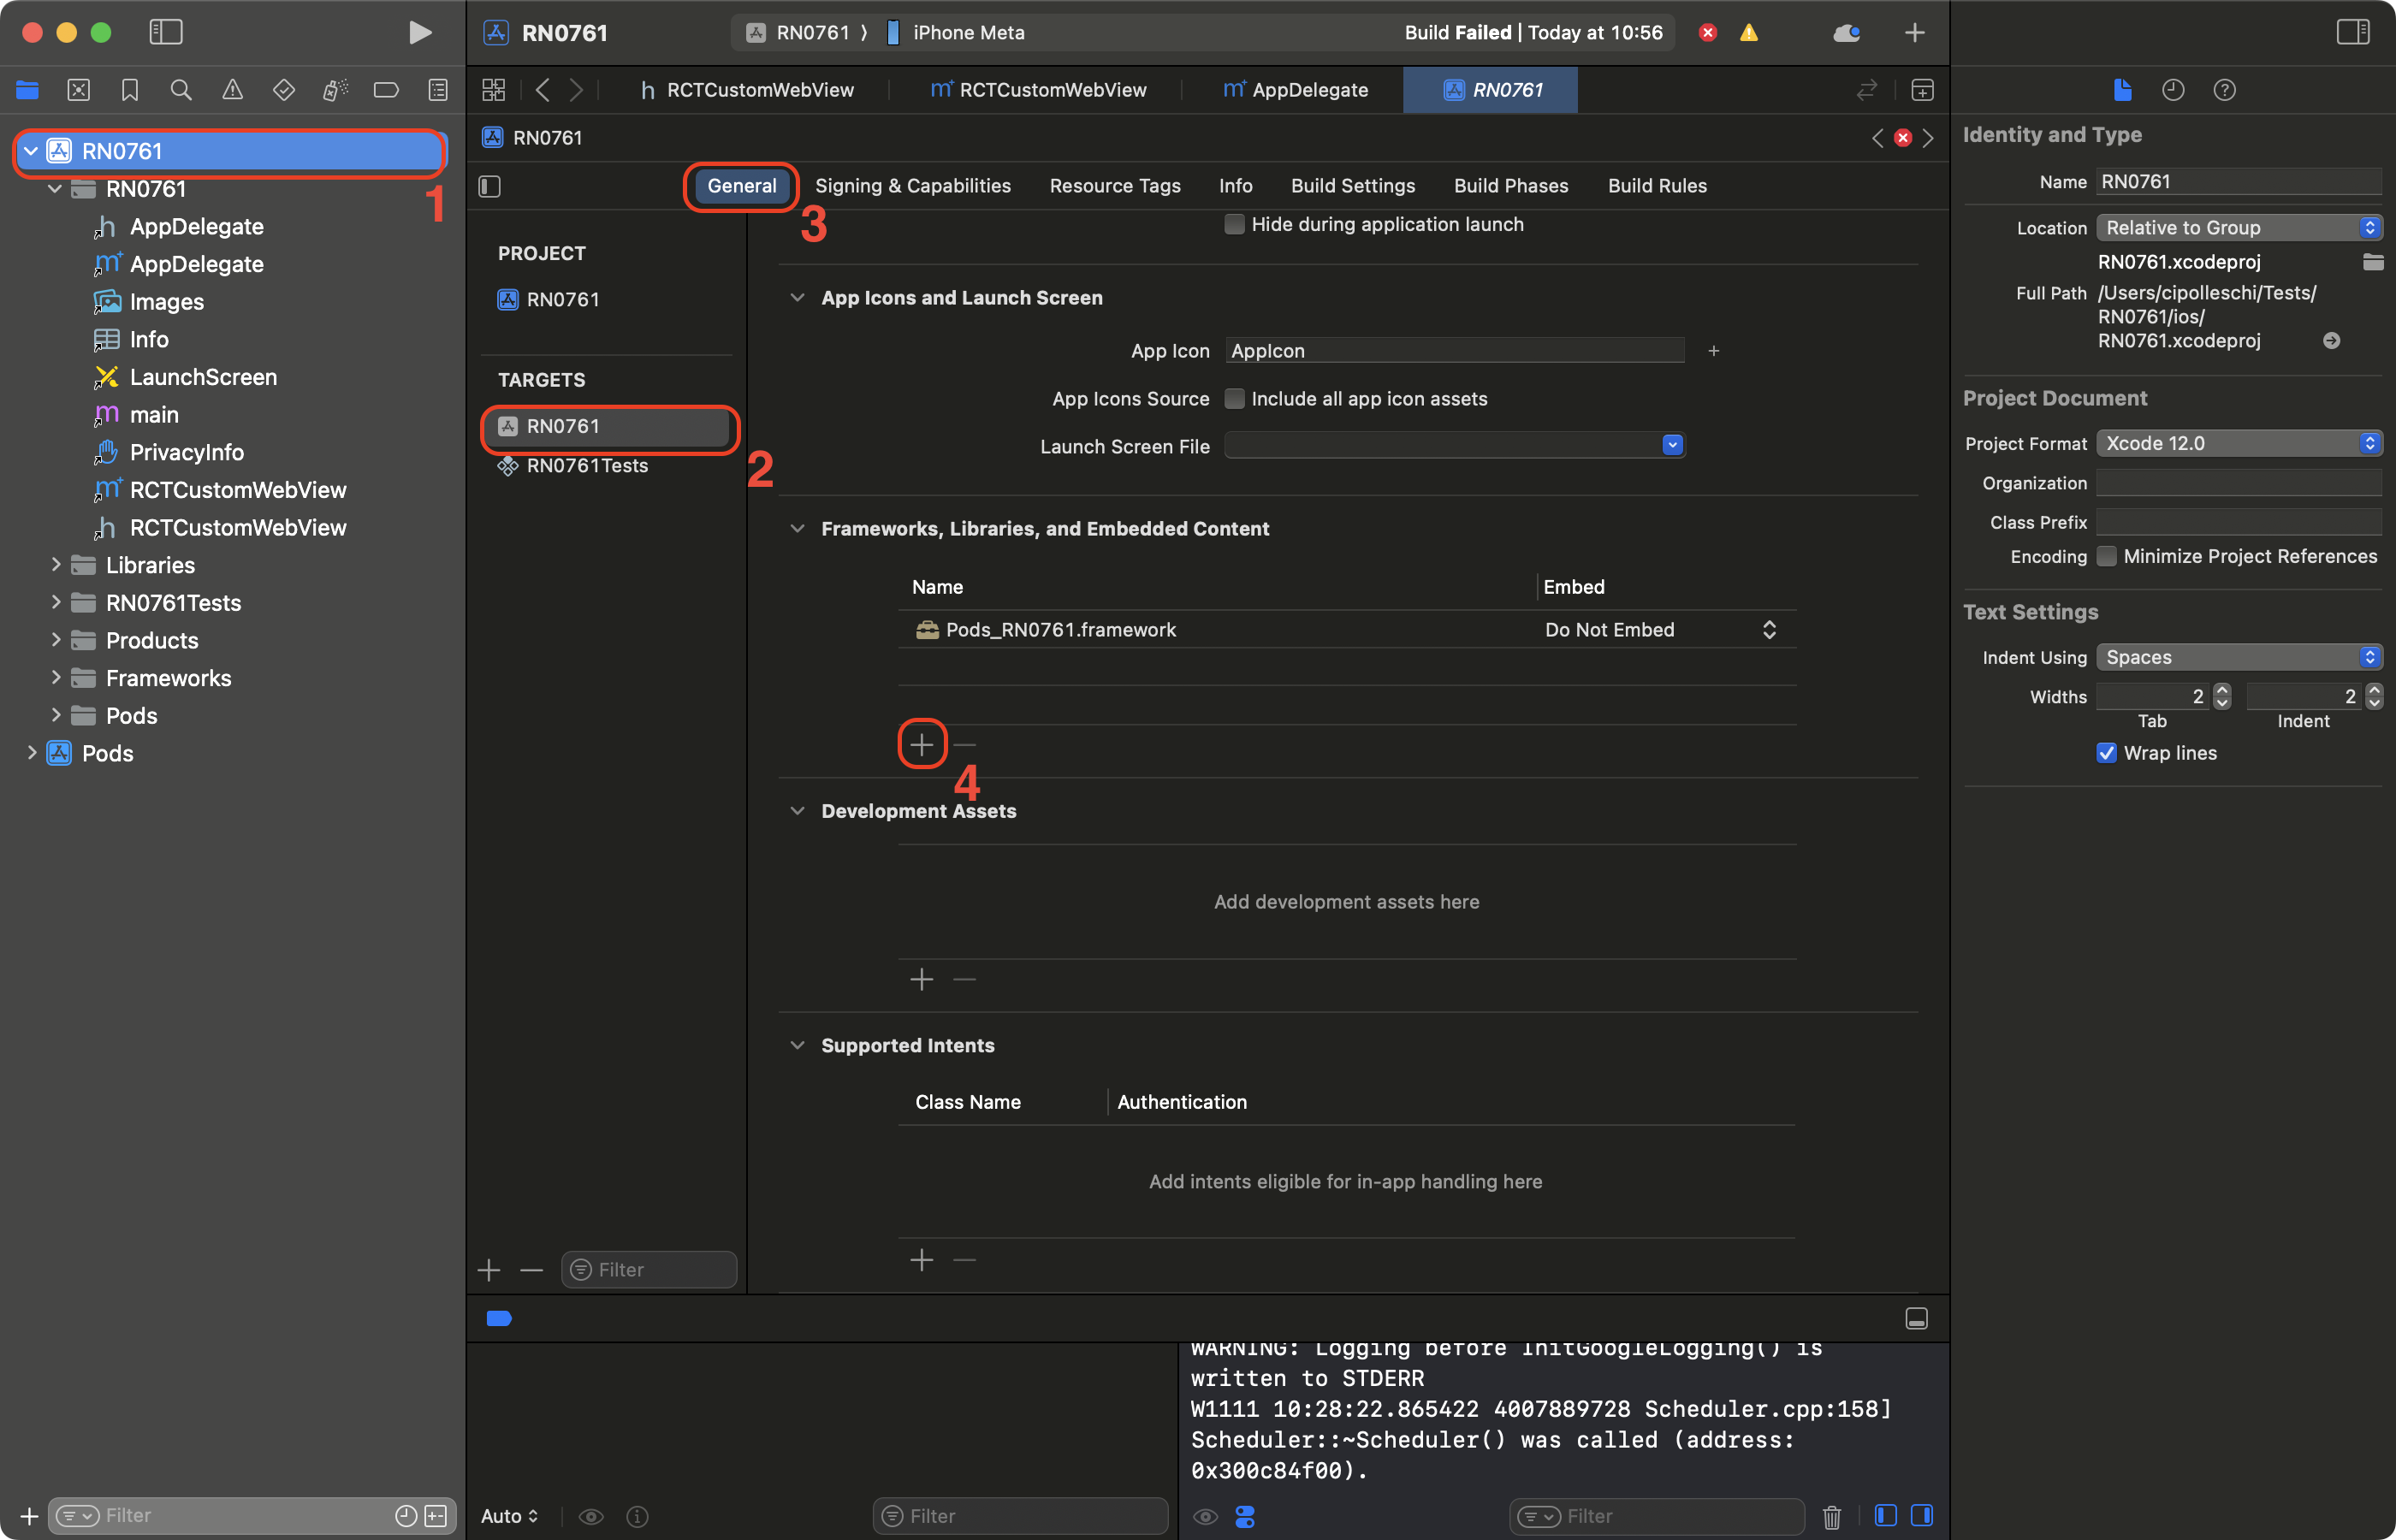
- 검색창에서 WebKit을 필터링한다.
- WebKit 프레임워크를 선택한다.
- Add를 클릭한다.
iOS에서 커스텀 iOS 컴포넌트와 함께 앱을 빌드할 때 발생할 수 있는 몇 가지 문제를 알고 있다.
- 컴포넌트가
yoga/style/Style.h헤더에 접근해야 하지만, 이 헤더는 현재 앱에서 사용할 수 없다. 이 문제를 해결하려면 앱의 빌드 설정에서 헤더 검색 경로에$(PODS_ROOT)/Headers/Private/Yoga경로를 추가한다. - Codegen이
RCTThirdPartyFabricComponentsProvider에 생성하지 말아야 할 라인을 생성하고 있다.RCTThirdPartyFabricComponentsProvider.h와RCTThirdPartyFabricComponentsProvider.mm파일에서WebViewCls심볼이 있는 라인을 제거한다.
이 문제들은 이미 수정되었으며 React Native 0.76.2 버전에서 릴리스될 예정이다.
3. 네이티브 컴포넌트 사용하기
마지막으로, 새로 만든 컴포넌트를 앱에서 사용할 수 있다. App.tsx 파일을 다음과 같이 업데이트한다:
import React from 'react';
import {Alert, StyleSheet, View} from 'react-native';
import WebView from './specs/WebViewNativeComponent';

function App(): React.JSX.Element {
  return (
    <View style={styles.container}>
      <WebView
        sourceURL="https://react.dev/"
        style={styles.webview}
        onScriptLoaded={() => {
          Alert.alert('Page Loaded');
        }}
      />
    </View>
  );
}

const styles = StyleSheet.create({
  container: {
    flex: 1,
    alignItems: 'center',
    alignContent: 'center',
  },
  webview: {
    width: '100%',
    height: '100%',
  },
});

export default App;
이 코드는 react.dev 웹사이트를 로드하기 위해 새로 만든 WebView 컴포넌트를 사용하는 앱을 만든다.
웹 페이지가 로드되면 알림을 표시한다.
4. WebView 컴포넌트로 앱 실행하기
- Android
- iOS
yarn run android
yarn run ios
| Android | iOS |
|---|---|
 |  |